Roof flashing might not be the first thing that comes to mind when you think of home maintenance, but it’s one of the most important defenses your home has against water damage. Whether you’re a confident DIYer or a beginner in roofing repairs, this guide will walk you through everything you need to know about how to install roof flashing correctly and safely.
What Is Roof Flashing and Why Is It Important?
Roof flashing is a thin, weather-resistant material (usually metal) that roofers install at points on a roof where water tends to collect or seep in like around chimneys, vents, roof valleys, or where the roof meets vertical walls.
Its job is simple but vital: redirect water away from vulnerable joints and openings. Without it, your roof is at risk of leaks, mold, rot, and costly interior damage. Flashing acts as a watertight barrier, extending the life of your roof and protecting everything underneath it.
If you’re wondering just how bad a leak can get, check out our guide on will a leak in the roof cause mold.
Types of Roof Flashing You Should Know
Choosing the right type of flashing is step one to a successful installation. Each type is designed for a different part of the roof:
- Step flashing – Installed where vertical walls meet the roof, like along dormers or chimneys.
- Valley flashing – Protects the valleys where two roof slopes meet; directs water down and off the roof.
- Vent pipe flashing – Fitted around vent or exhaust pipes to keep moisture out.
- Chimney flashing – A combination of step and counter flashing used to protect all four sides of the chimney.
- Drip edge flashing – Placed along the roof edges to keep water away from the fascia and underlying wood.
- Skylight flashing – Usually comes as a kit with skylights, seals the gap between the skylight and roof.
Each type plays a specific role. Not sure what you need? Take a look at this breakdown of types of roof flashing to understand which one fits your project.
Tools and Materials Needed for Roof Flashing Installation
Before you start working on your roof, gather everything you need. Having the right tools not only makes the job smoother, it keeps you safe.
Essential Tools
- Hammer or roofing nail gun
- Tin snips (for cutting metal flashing)
- Utility knife
- Measuring tape
- Pry bar (to remove old flashing or shingles)
- Ladder and fall protection harness
- Caulking gun
- Chalk line
Materials
- Appropriate roof flashing (aluminum, galvanized steel, copper)
- Roofing nails
- Roofing cement or silicone sealant
- Ice and water shield (optional but recommended in colder regions)
- Replacement shingles (if removing old ones)
Safety First: If you’re working on a steep roof or above one story, always use a harness and anchor system. Review these roofing safety guidelines before climbing.
Step-by-Step Roof Flashing Guide
Follow these clear steps to install flashing like a pro. The exact process depends on the type of flashing you’re working with, but the principles are similar.
1. Remove Old Flashing and Prep the Area
Use a pry bar to carefully remove existing flashing. Avoid damaging nearby shingles unless they’re being replaced. Clean the area and inspect the underlying deck for rot or soft spots.
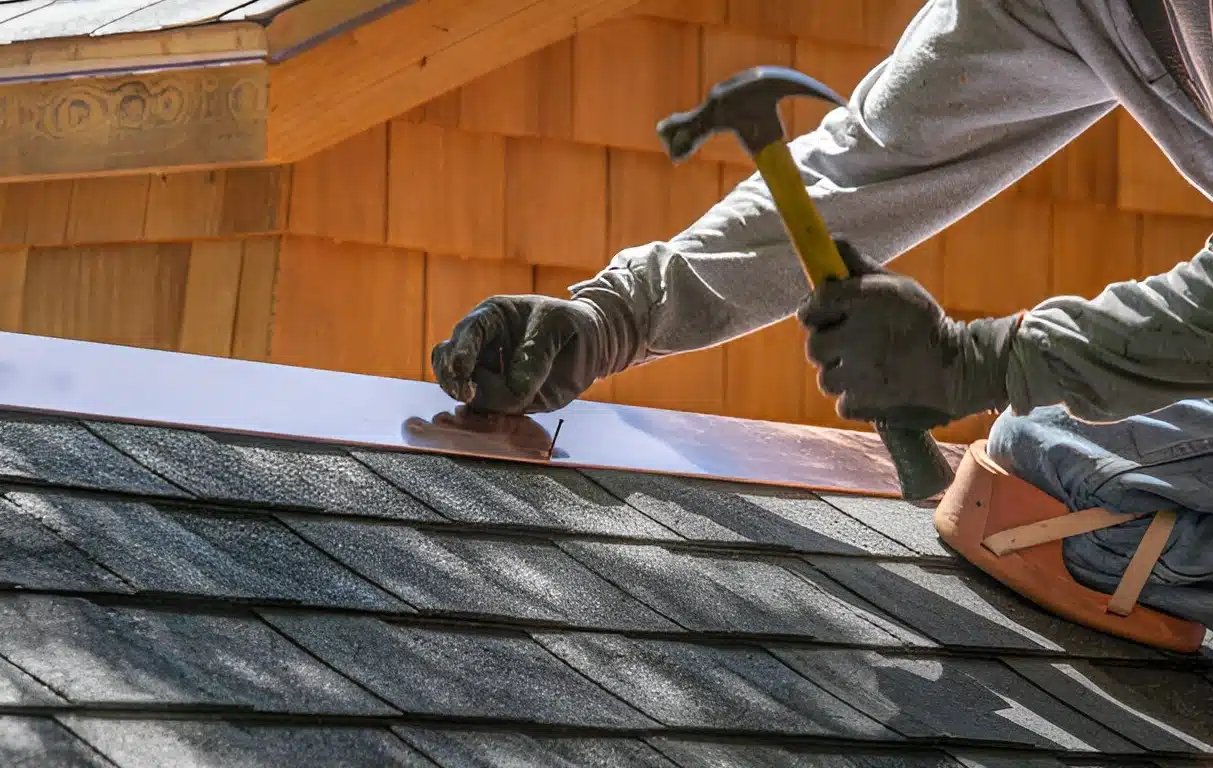
2. Install Step Flashing (for Walls and Chimneys)
Step flashing is placed where the roof meets a vertical surface.
Steps:
- Start at the bottom, laying flashing so it overlaps the shingle below.
- Nail flashing to the roof deck only not the wall to allow for expansion.
- Alternate between flashing and shingles as you move up the roof.
- For chimneys, wrap flashing around each corner and embed counter flashing into the brick mortar line above.
3. Chimney Flashing Installation (Advanced)
- Begin with the base flashing at the front of the chimney.
- Add step flashing along both sides, shingle by shingle.
- Seal the top edge with counter flashing that is cut into the chimney mortar.
- Use roofing cement to seal all seams and overlaps.
4. Vent or Pipe Flashing
- Slide the flashing base under the shingles on the upslope side.
- Nail the flange to the roof, then seal the perimeter with roofing cement.
- Ensure the rubber boot fits snugly around the pipe.
5. Valley Flashing Installation
- Lay a full-length metal valley strip down the roof valley.
- Nail it securely along the edges (not in the center channel).
- Leave a 2–4” gap in shingle coverage to keep the valley exposed.
6. Drip Edge Flashing
- For eaves: Install drip edge under the underlayment.
- For rakes: Install it over the underlayment.
- Nail every 10–12 inches and overlap pieces by at least 2 inches.
Common Roof Flashing Mistakes to Avoid
Many flashing issues stem from simple oversights. Watch out for these:
- Nailing flashing to both roof and wall — This prevents proper movement and can cause cracks.
- Incorrect overlap direction — Always overlap flashing pieces in the direction water flows.
- Not sealing joints — Open seams are a fast path for leaks.
- Reusing old flashing — Old flashing can warp or corrode, even if it looks okay.
Flashing Maintenance Tips to Prevent Roof Leaks
Once installed, flashing should last for years but only with proper care.
Maintenance Checklist:
- Inspect flashing annually, especially after storms.
- Clear away leaves and debris that collect around flashing.
- Re-seal joints and edges with silicone or roofing cement if cracks appear.
- Replace flashing immediately if rust or corrosion is visible.
Routine flashing checks can catch minor issues before they become major expenses. Not sure if it’s time for a full roof upgrade? Read our post on how often does a roof need to be replaced.
Final Thoughts: Protect Your Roof from the Ground Up
Understanding how to install roof flashing is an important skill for any homeowner or budding contractor. Proper flashing installation ensures your roof stays leak-free and extends its lifespan by years. With the right tools and instructions, many flashing jobs are entirely DIY-friendly.
However, when in doubt especially for steep roofs or chimneys, it’s best to bring in a professional. Lone Wolf Roofing offers roof installation services across Louisiana with trusted expertise.
Bookmark this guide for your next roof repair project, or contact us today for help with more complex installations.
FAQ: Roof Flashing Installation
What is roof flashing and why is it important?
Roof flashing is a waterproof barrier installed at vulnerable points on the roof to redirect water. It prevents leaks and structural damage.
Can I install roof flashing myself?
Yes, you can especially for low-slope roofs and basic flashing types like step or vent flashing. For steep or high roofs, professional installation is safer.
What are the different types of flashing?
Common types include step flashing, valley flashing, vent pipe flashing, chimney flashing, and drip edge flashing. Each type is used for specific roof intersections.
Where should flashing be installed on a roof?
Flashing should be placed anywhere there’s a change in roof pitch, materials, or penetrations like chimneys, skylights, vents, valleys, and eaves.
How do you seal roof flashing?
Seal joints and edges with high-quality roofing cement or silicone sealant. Flashing should overlap correctly and be secured with nails on the roof side only.
Looking for an easy roofing project to start with? Try our post on the simplest roof to cover a porch.


